Tutorial Rodin First Step: Difference between revisions
No edit summary |
Update links to new server |
||
| (4 intermediate revisions by the same user not shown) | |||
| Line 4: | Line 4: | ||
== Installation == | == Installation == | ||
First you need to download the Rodin platform (e.g, [ | First you need to download the Rodin platform (e.g, [https://sourceforge.net/projects/rodin-b-sharp/files/Core_Rodin_Platform/3.6/ Rodin 3.6],) if you have not already done so. | ||
Continue by installing the ProB for Rodin Plugin by choosing "Install new software..." in the Help menu. | Continue by installing the ProB for Rodin Plugin by choosing "Install new software..." in the Help menu. | ||
| Line 11: | Line 11: | ||
In the dialog box you should then select the ProB for Rodin update site, and then select the various components of ProB as shown below. | In the dialog box you should then select the ProB for Rodin update site, and then select the various components of ProB as shown below. | ||
(the update site for Rodin 3.x is | (the update site for Rodin 3.x is https://stups.hhu-hosting.de/rodin/prob1/release/ for stable builds, and https://stups.hhu-hosting.de/rodin/prob1/nightly for nightly builds, in case you want to type it by hand). | ||
[[file:ProBRodinUpdateDialog.png|center||550px]] | [[file:ProBRodinUpdateDialog.png|center||550px]] | ||
After that, press the Next button and finish the installation. | After that, press the Next button and finish the installation. | ||
== Starting ProB == | == Starting ProB == | ||
| Line 50: | Line 47: | ||
Next Step: | Next Step: | ||
* [[Tutorial Rodin Parameters|Important Parameters of ProB for Rodin]] | * [[Tutorial Rodin Parameters|Important Parameters of ProB for Rodin]] | ||
Latest revision as of 12:39, 23 February 2023
Installation
First you need to download the Rodin platform (e.g, Rodin 3.6,) if you have not already done so.
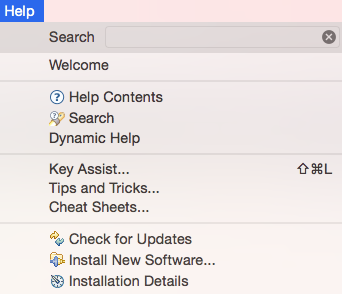
Continue by installing the ProB for Rodin Plugin by choosing "Install new software..." in the Help menu.
In the dialog box you should then select the ProB for Rodin update site, and then select the various components of ProB as shown below. (the update site for Rodin 3.x is https://stups.hhu-hosting.de/rodin/prob1/release/ for stable builds, and https://stups.hhu-hosting.de/rodin/prob1/nightly for nightly builds, in case you want to type it by hand).
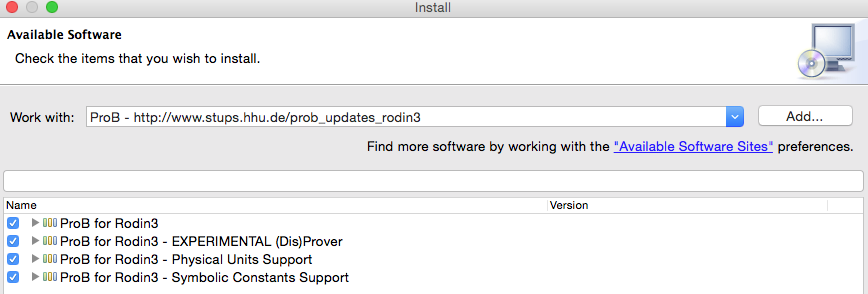
After that, press the Next button and finish the installation.
Starting ProB
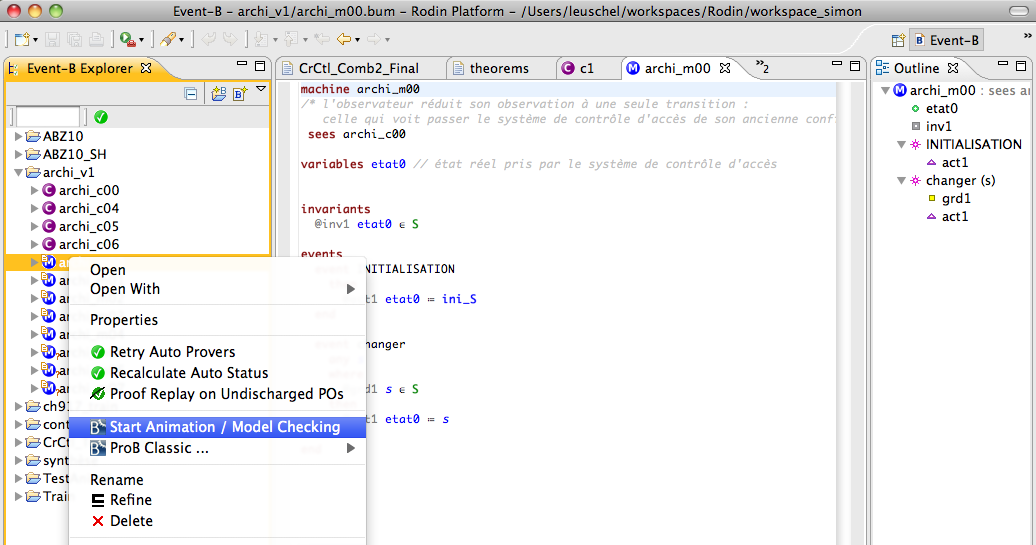
Start by right clicking (control Click on the Mac) on the machine or context you wish to animate and select "Start Animation/Model Checking":
Double-click on the INITIALISATION to initialize the machine:
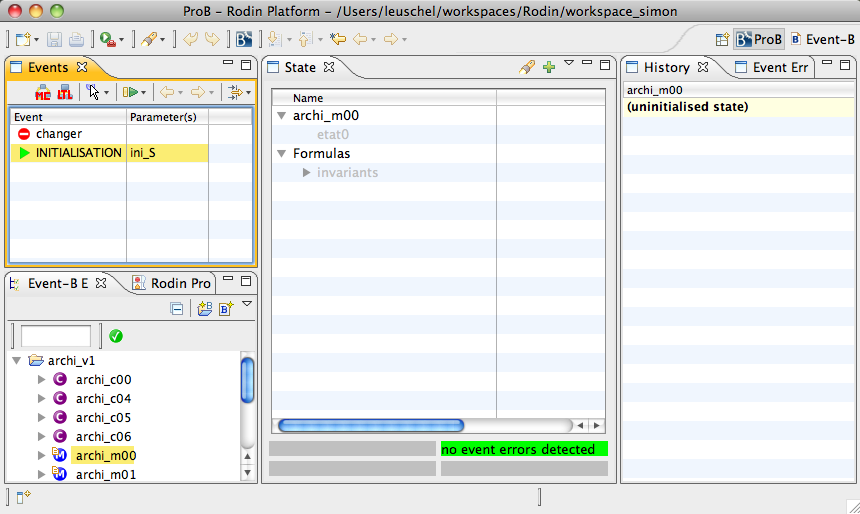
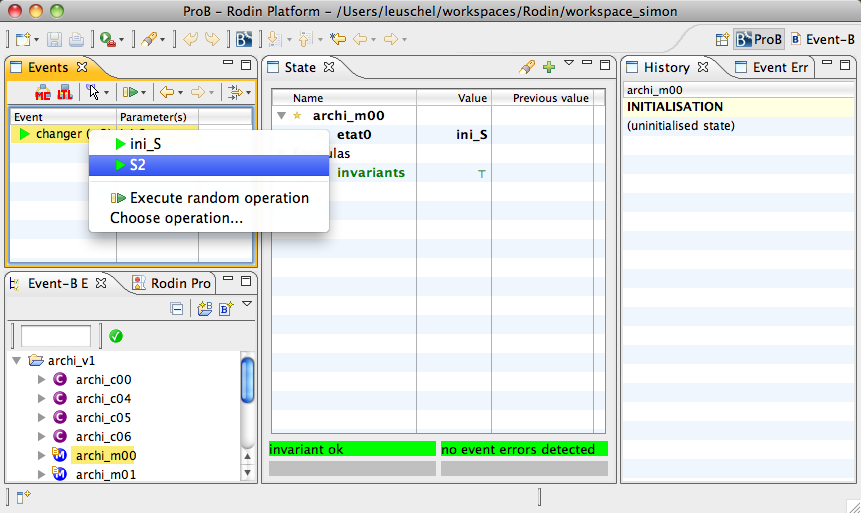
As you can see, the changer event is enabled, and there are two distinct ways to choose the parameters of the event. Double-click on an EVENT to execute it. If you want to control which parameters are used, right click on the EVENT and choose the desired parameter values:
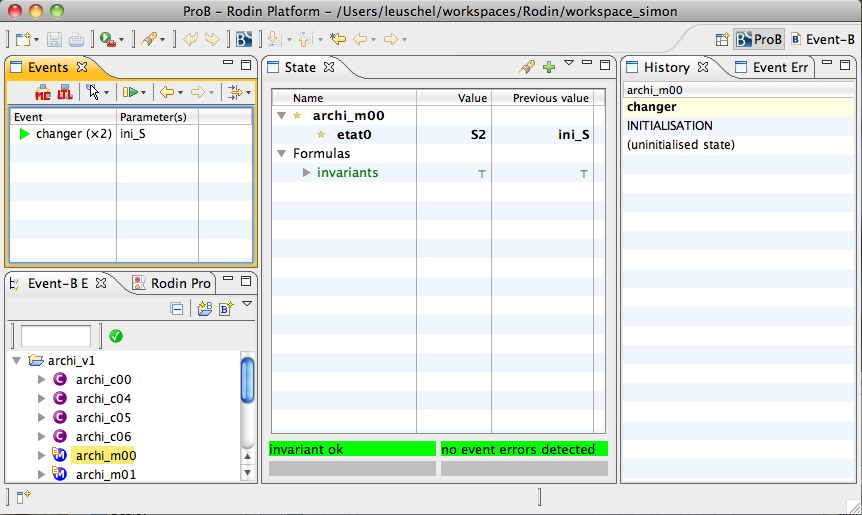
As you can see, the values of the variables have been updated. Values that have changed are marked with a star. The history pane has also been updated. You can click on an event in the history to return back to the corresponding state. You can also click on the left arrow in the Events pane to go back one step at a time (once you stepped back you can also step forward again; this works just like in a web browser).
Next Step: