Tutorial Directed Model Checking
We assume that you have completed Tutorial First Model Checking and Complete model checking.
Here we will look a bit closer at the search strategy options of the ProB model checker. You can set the mode using the -mc_mode command-line switch of probcli. In the Tcl/Tk version you can select the strategy in the model checking dialog box (which you obtain via the"Model Check..." command in the "Verify" menu):
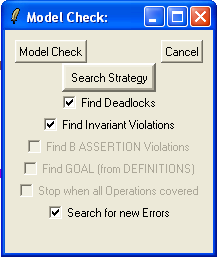
The following values are possible in all versions of ProB:
- Mixed DF/BF (mixed for mc_mode) : mixed depth-first / breadth-first traversal with random choice; currently the default),
- Breadth First (bf for mc_mode): breadth-first traversal,
- Depth First (df) depth-first traversal,
As of version 1.5.1, the following options are also available:
- Heuristic Function / Random (heuristic for mc_mode) : try and use HEURISTIC_FUNCTION provided by user in DEFINITIONS clause; states with the smallest value for the heuristic function are treated first by the model checker. Some explanations can be found in an example about directed model checking.
- Random (random) : choosing next node to process completely at random,
- Hash-Random (hash) :similar to random, but uses the Prolog hash function of a node instead of a random number generator,
- Out-Degree for Deadlock Checking (out_degree_hash): prioritise nodes with fewer outgoing transitions; mainly useful for deadlock checking.
Note that for exhaustive model checking, where you have to look at the entire state space and no error state is found, the search strategy has little nor no influence: it does not really matter in which order we process the states, when we have to examine all of them anyway. In this case, the depth-first search is probably the most adequate choice: its memory requirement is smaller. However, when you expect an error (or goal state) to be found and when the state space is very large (or even infinite), then the search strategy can make a big difference: the difference between finding an error state very quickly, or only after a very long time or possibly never at all.
To illustrate the effect of the search strategy we use the following simple example:
MACHINE phonebook7
SETS
	Name  ; Code = {c1,c2,c3,c4}
VARIABLES db, active, activec
DEFINITIONS
    scope_Name == 1..4
INVARIANT
		db : Name +-> Code & active:POW(Name) & activec:POW(Code) &
                dom(db) = active & ran(db) = activec
ASSERTIONS
  card(active) >= card(activec)
INITIALISATION
	db := {} || active := {} || activec := {}
OPERATIONS
dd <-- getdom = dd:= dom(db);
cc <-- lookup(nn) =
	PRE
		nn : Name & nn : active
	THEN
		cc:=db(nn)
	END;
add(nn,cc) =
	PRE
		nn:Name & cc:Code  & nn /: active
	THEN
		db := db \/ { nn |-> cc} || active := active \/ {nn} || activec := activec \/ {cc}
	END;
delete(nn,cc) =
        PRE
                nn:Name & cc:Code & nn: active & cc: activec & db(nn) = cc
        THEN
               db := db - { nn |-> cc} || active := active - {nn} || activec := db[(active - {nn})]
        END
END
We will illustrate the state space that ProB generates using the various search strategies when limiting the search to 10 nodes. For this we use the command-line version as follows (as there we can provide exactly how many states should be explored):
$ probcli phonebook7.mch -p MAX_OPERATIONS 99 -mc 10 -spdot out.dot -p DOT_LEAVES FALSE -mc_mode <MODE>
However, you can also obtain a similar effect with the Tcl/Tk version by starting the model checker and then quickly pressing the Cancel button and then inspecting the state space (Statespace command in the Visualise menu; see Tutorial_First_Model_Checking). Below we show the output of the above command for the various choices of <MODE>.
Breadth-First
$ probcli phonebook7.mch -p MAX_OPERATIONS 99 -mc 10 -spdot out.dot -p DOT_LEAVES FALSE -mc_mode bf

This mode has the advantage of finding shortest counter examples first. We also have a guarantee that, provided a counter example exists, a counter example will sooner or later be found. However, the memory requirements can be very large and it can take very long to find long counter examples.
Depth-First
$ probcli phonebook7.mch -p MAX_OPERATIONS 99 -mc 10 -spdot out.dot -p DOT_LEAVES FALSE -mc_mode df

The depth-first traversal has the advantage of lower memory requirements (concerning storing the unprocessed nodes) and can find very deep counter examples. While it is typically the best choice for exhaustive model checking, it can be a poor choice for models with errors. Indeed, if the state space is infinite, then depth-first may progress infinitely in one direction, and never find existing counter examples. Also, when depth-first search finds a counter example, it is typically very long and possibly hard to understand for the user. The next search strategy, tries to combine the advantages of breadth-first and depth-first search.
Mixed DF/BF
The mixed search strategy, tries to combine the advantages of breadth-first and depth-first search. It is the default setting for ProB. It has the advantage of ensuring the exploration of some branches in depth, to find errors which require long counter examples (e.g., starvation, resource exhaustion kind of bugs). But it also ensures that we examine the specification more systematically in breadth, and is thus also good at finding counter examples which require exhaustively to test all operations (e.g., many errors simply require a particular faulty B operation to be executed).
$ probcli phonebook7.mch -p MAX_OPERATIONS 200 -mc 10 -spdot out.dot -p DOT_LEAVES FALSE -mc_mode mixed
The result will vary from one run of ProB to another:
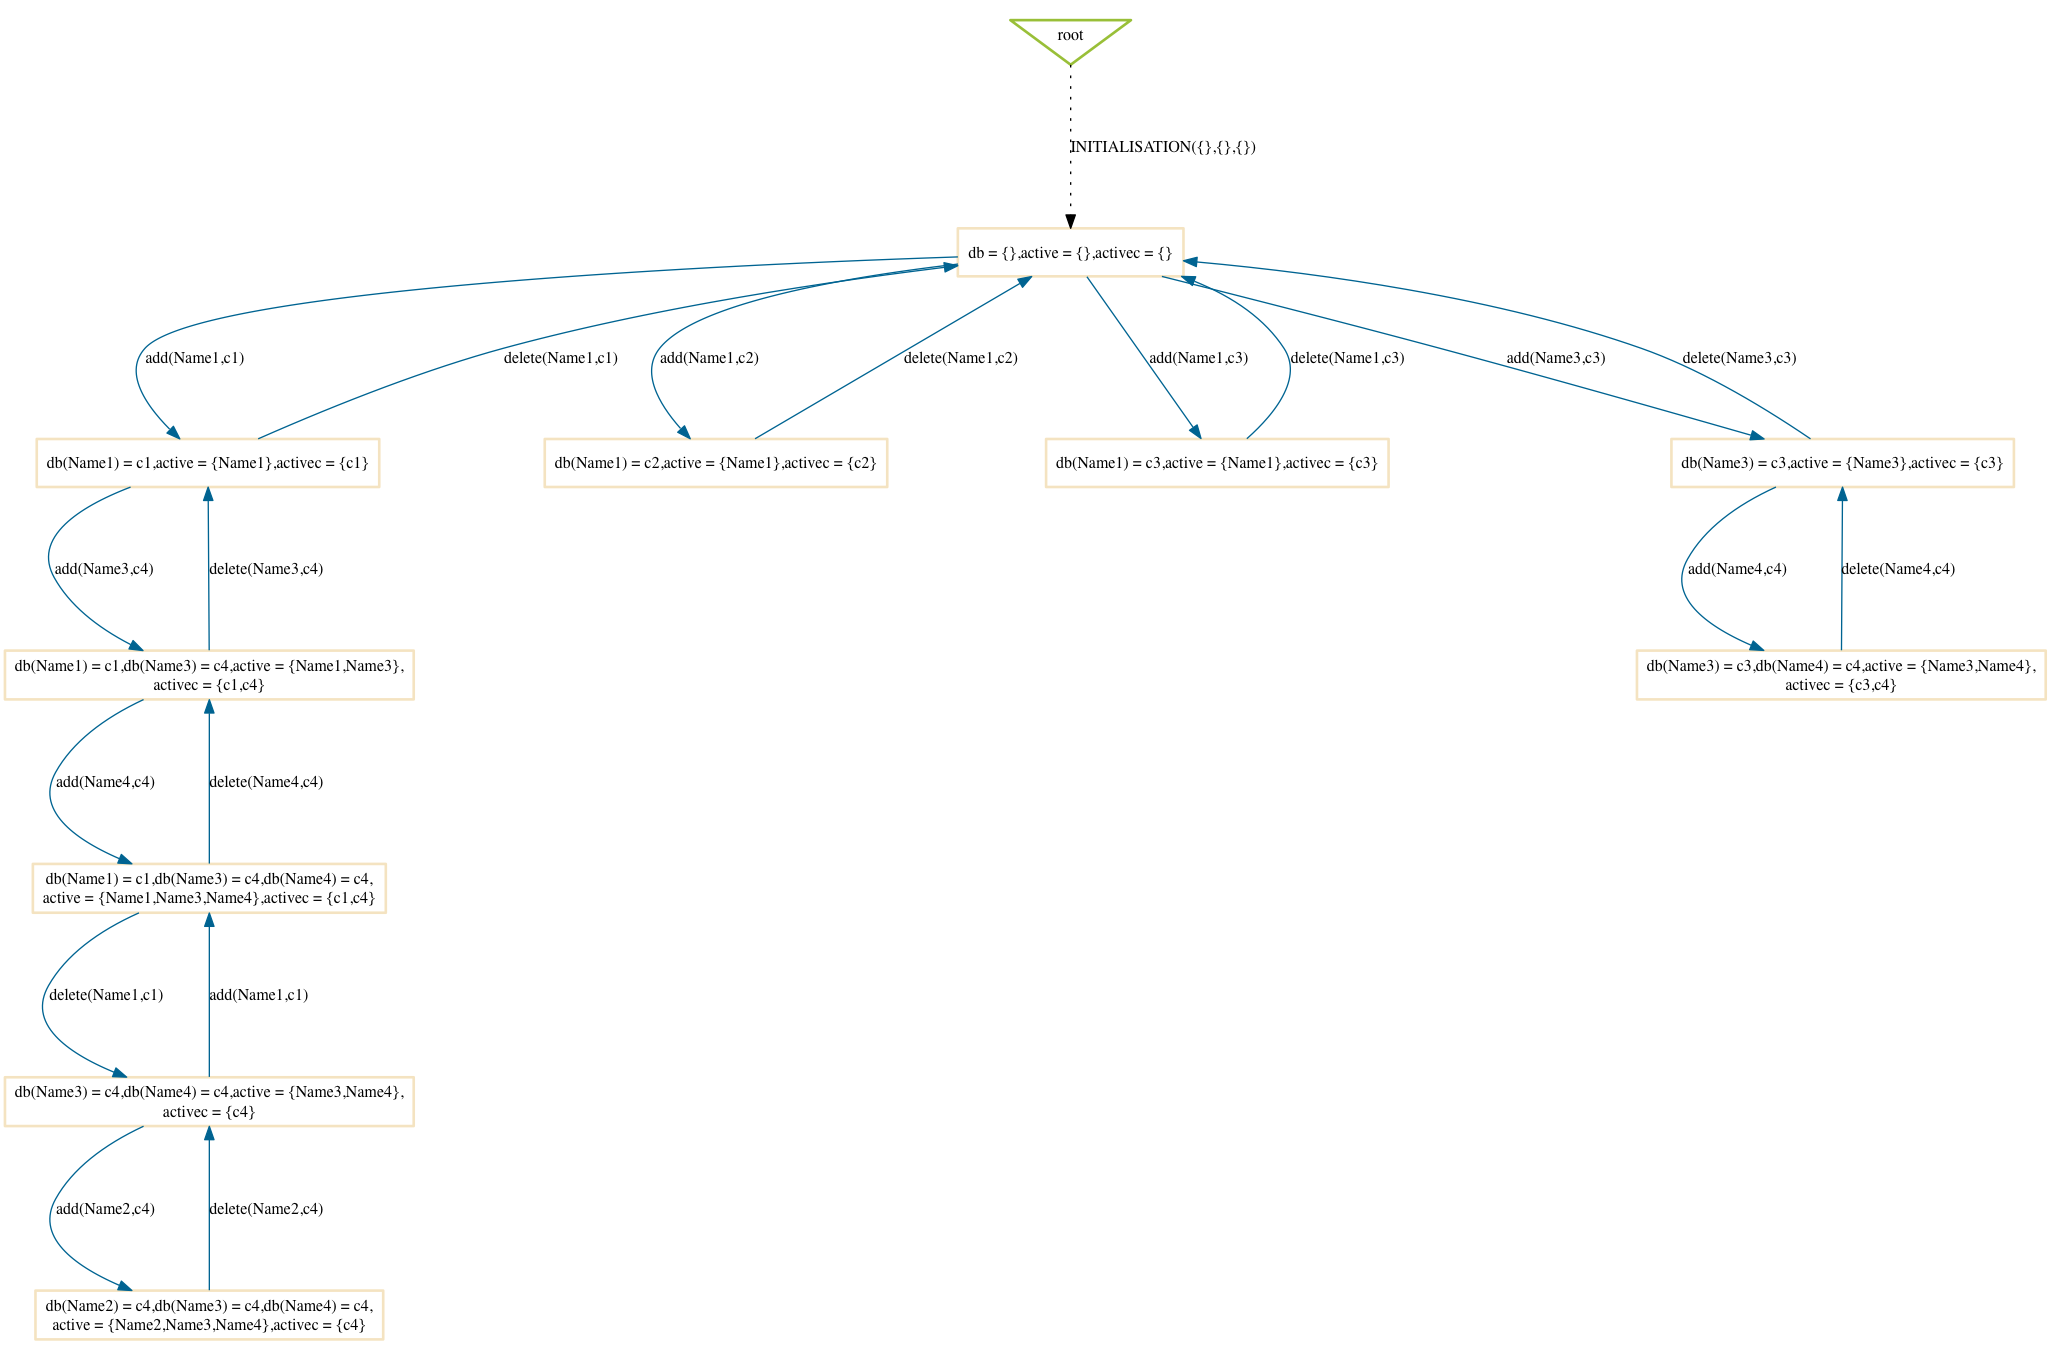

It is interesting to compare this result with the random search strategy, which we show next.
Random
$ probcli phonebook7.mch -p MAX_OPERATIONS 99 -mc 10 -spdot out.dot -p DOT_LEAVES FALSE -mc_mode random
Here are two sample results:
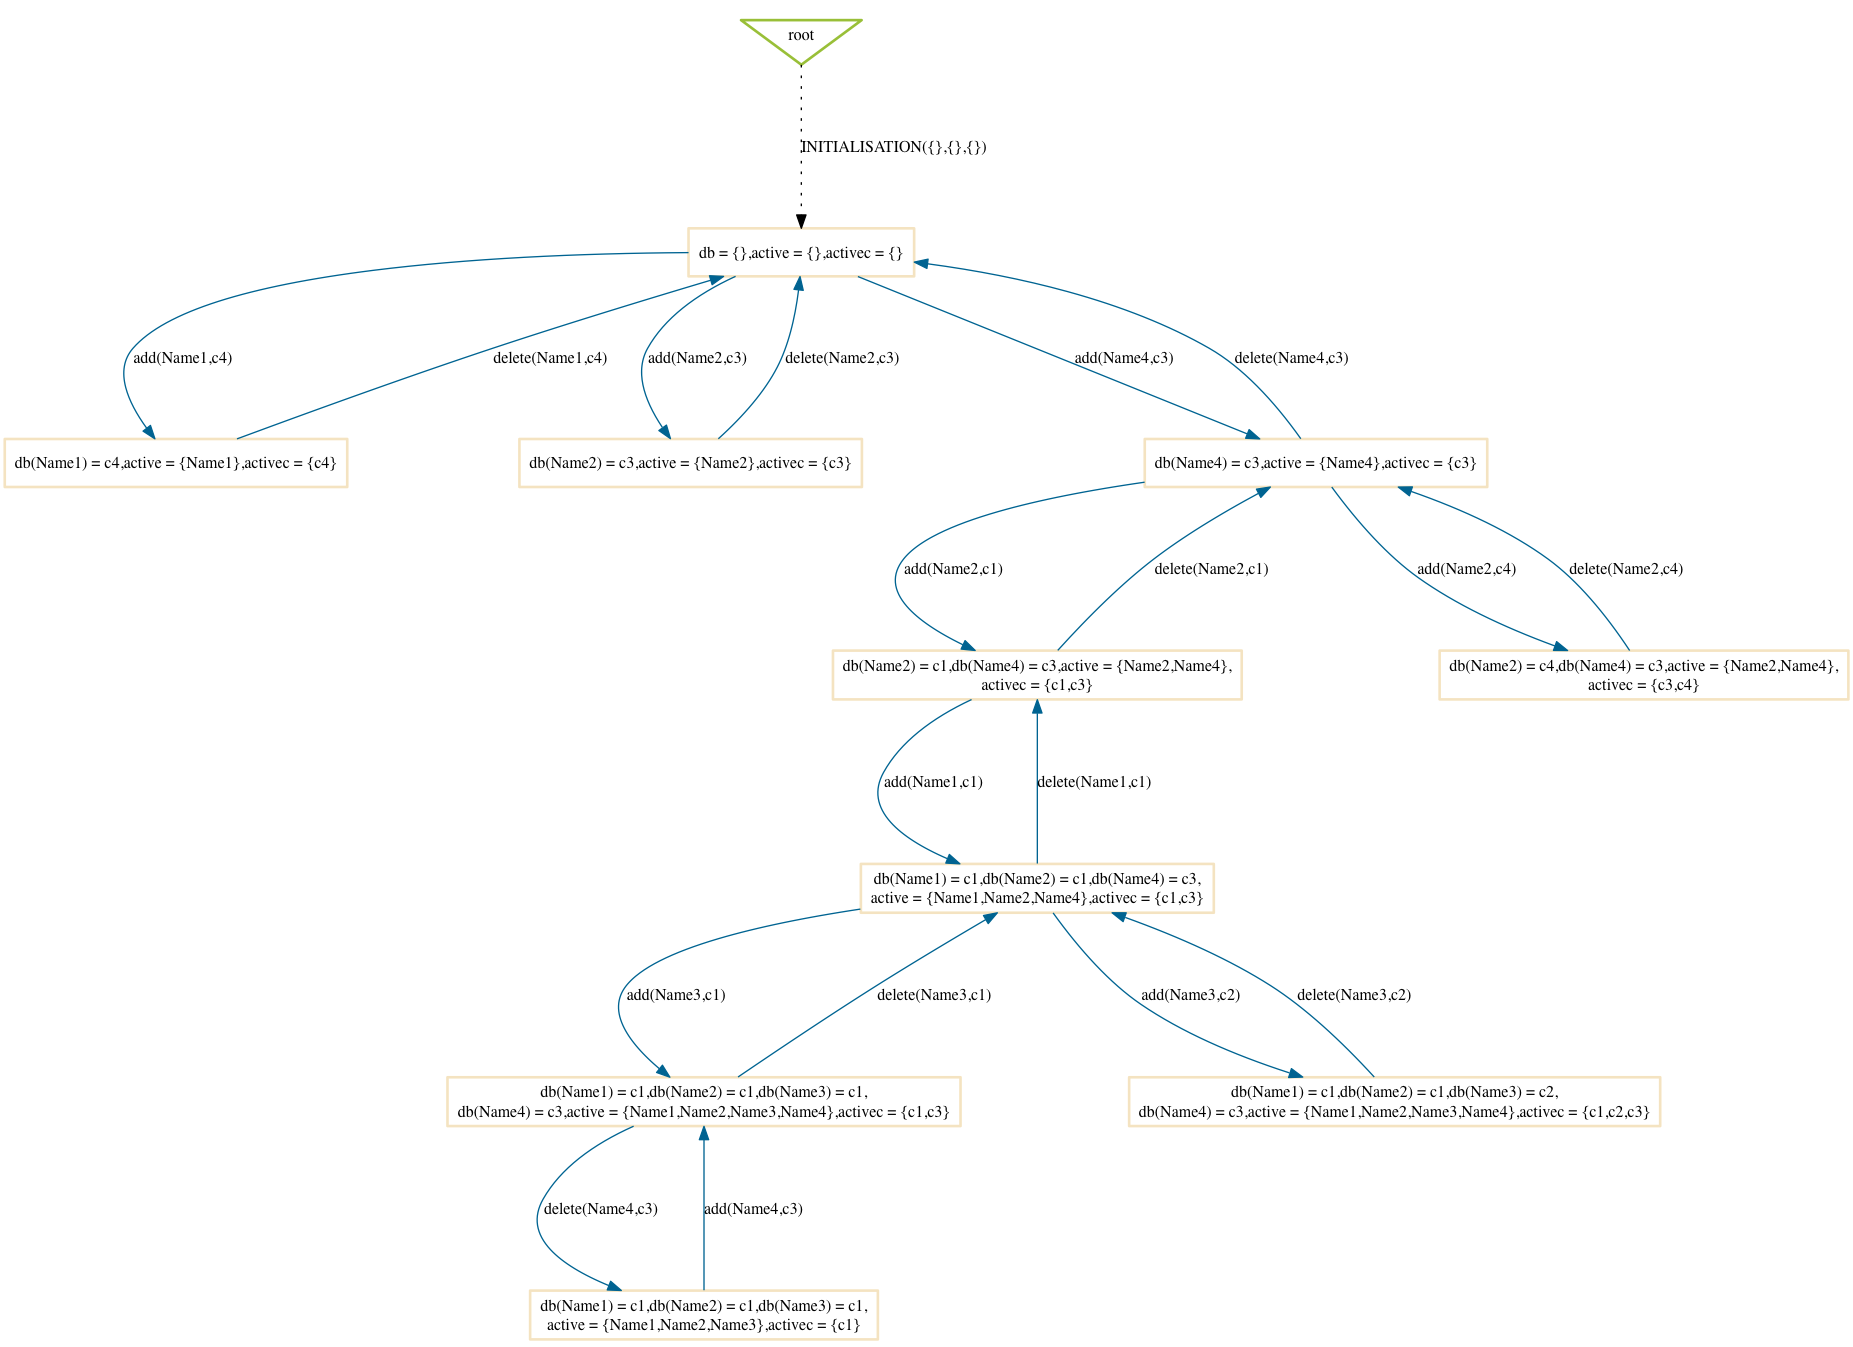
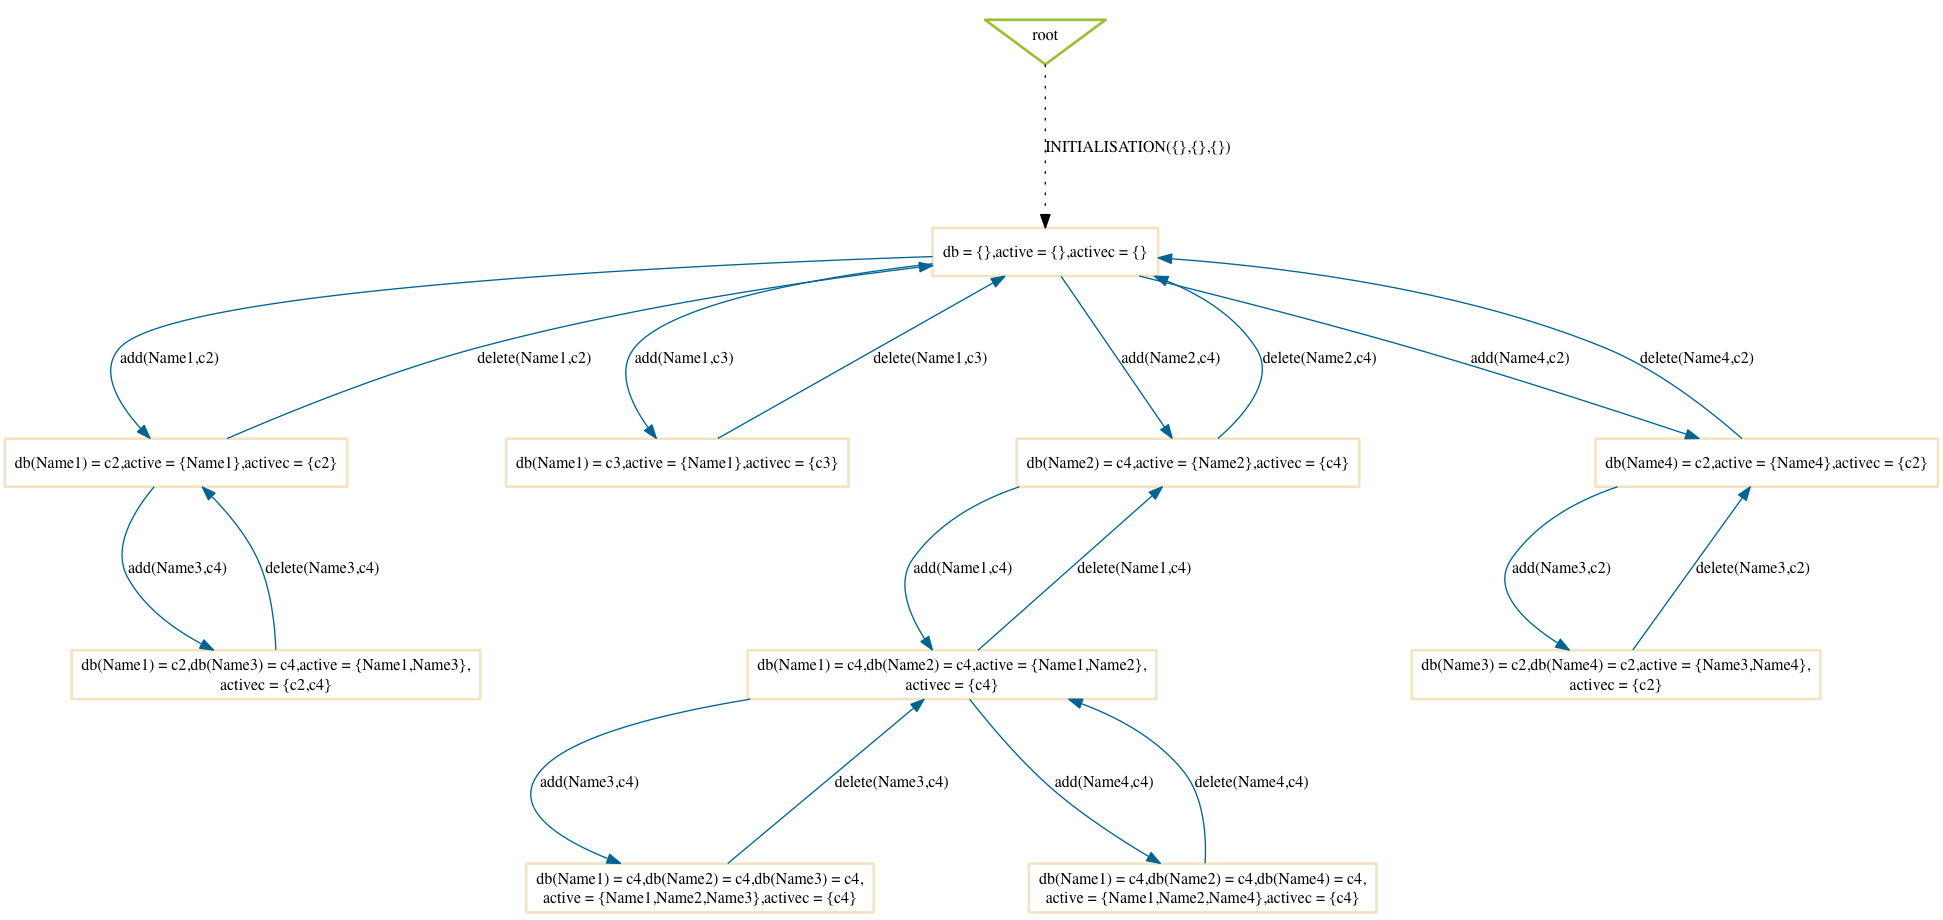
Compared to the mixed option one can notice that the mixed option has more of a tendency to explore certain branches in depth.
Hash
$ probcli phonebook7.mch -p MAX_OPERATIONS 99 -mc 10 -spdot out.dot -p DOT_LEAVES FALSE -mc_mode hash
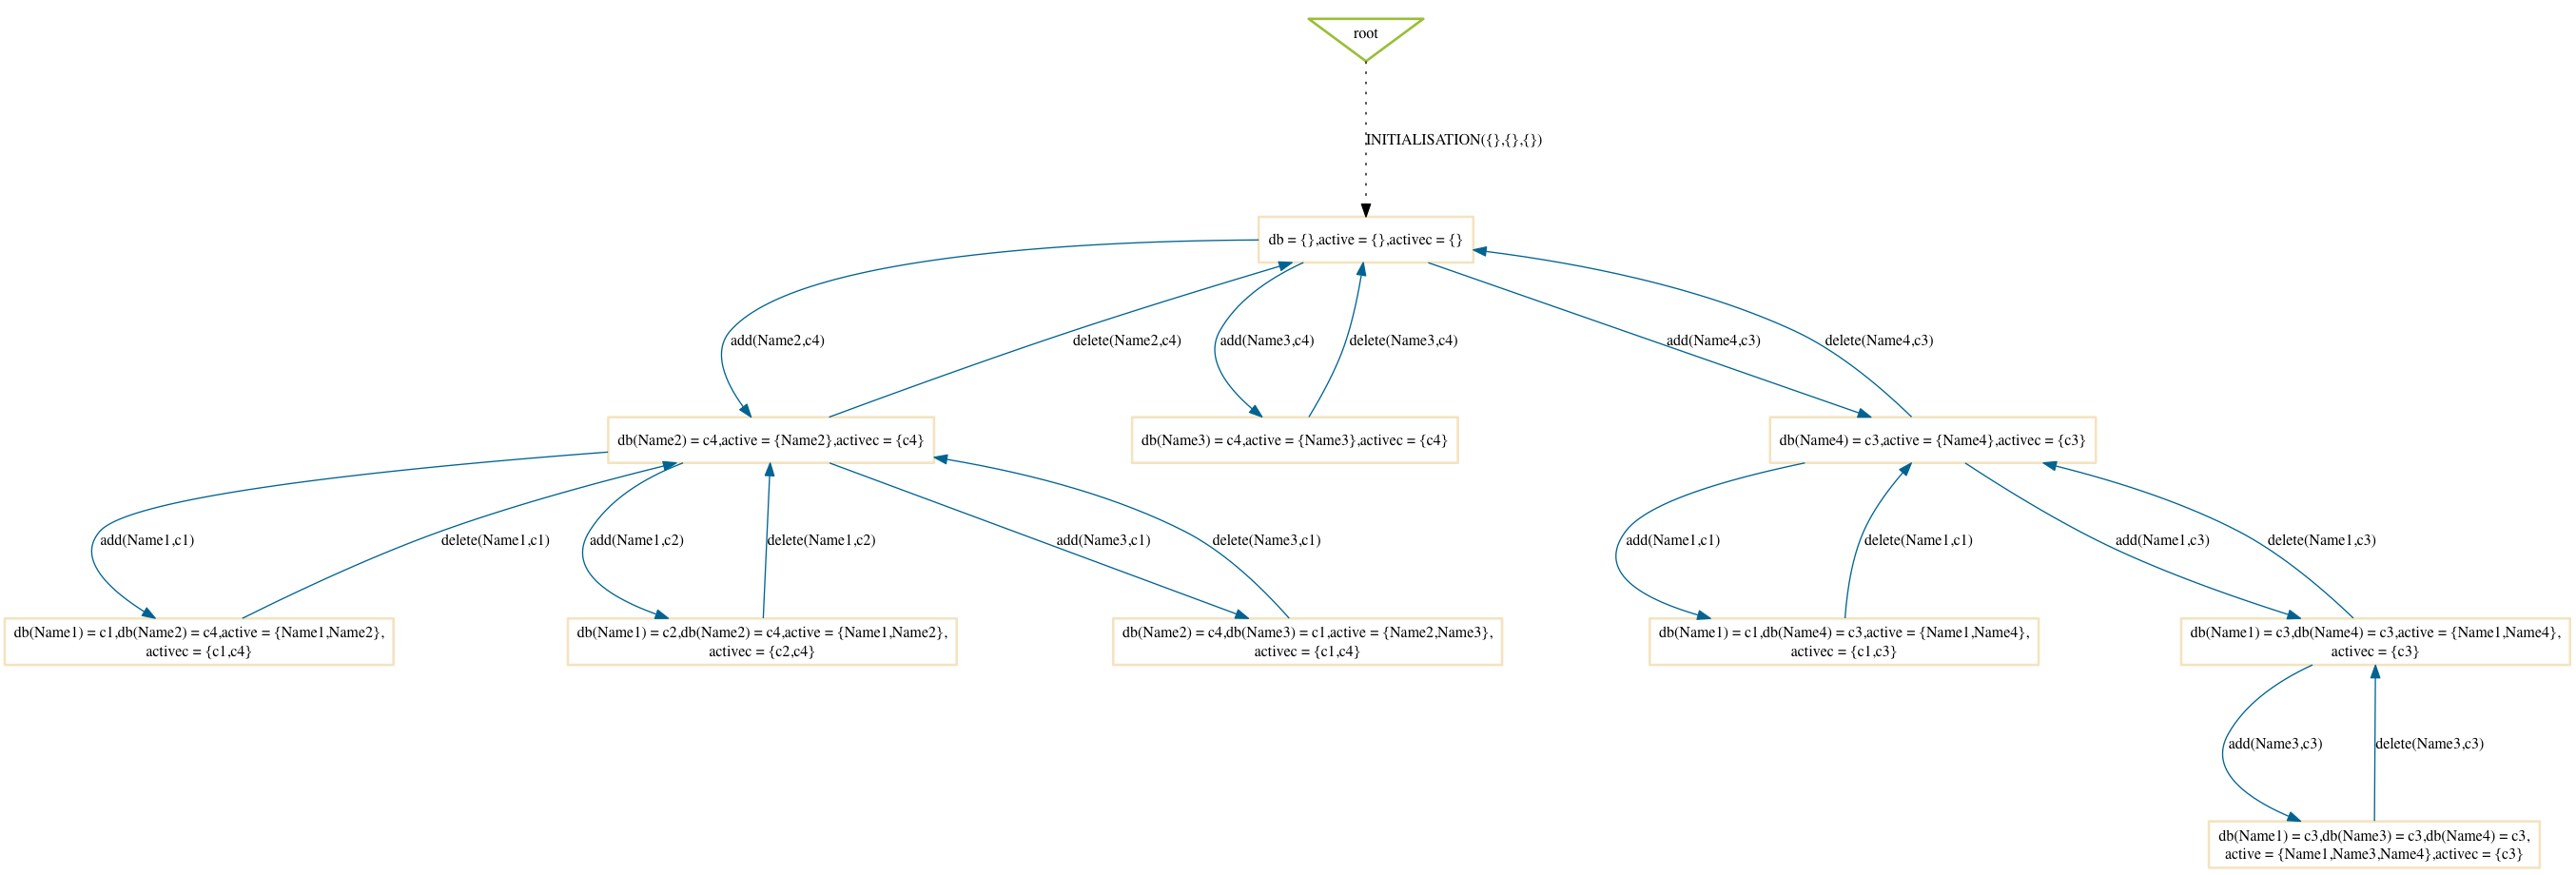
The difference with the random option is that this will always return the same result, as the hash value of the states do not change from one run of ProB to another.
Out-Degree
$ probcli phonebook7.mch -p MAX_OPERATIONS 99 -mc 10 -spdot out.dot -p DOT_LEAVES FALSE -mc_mode dlk
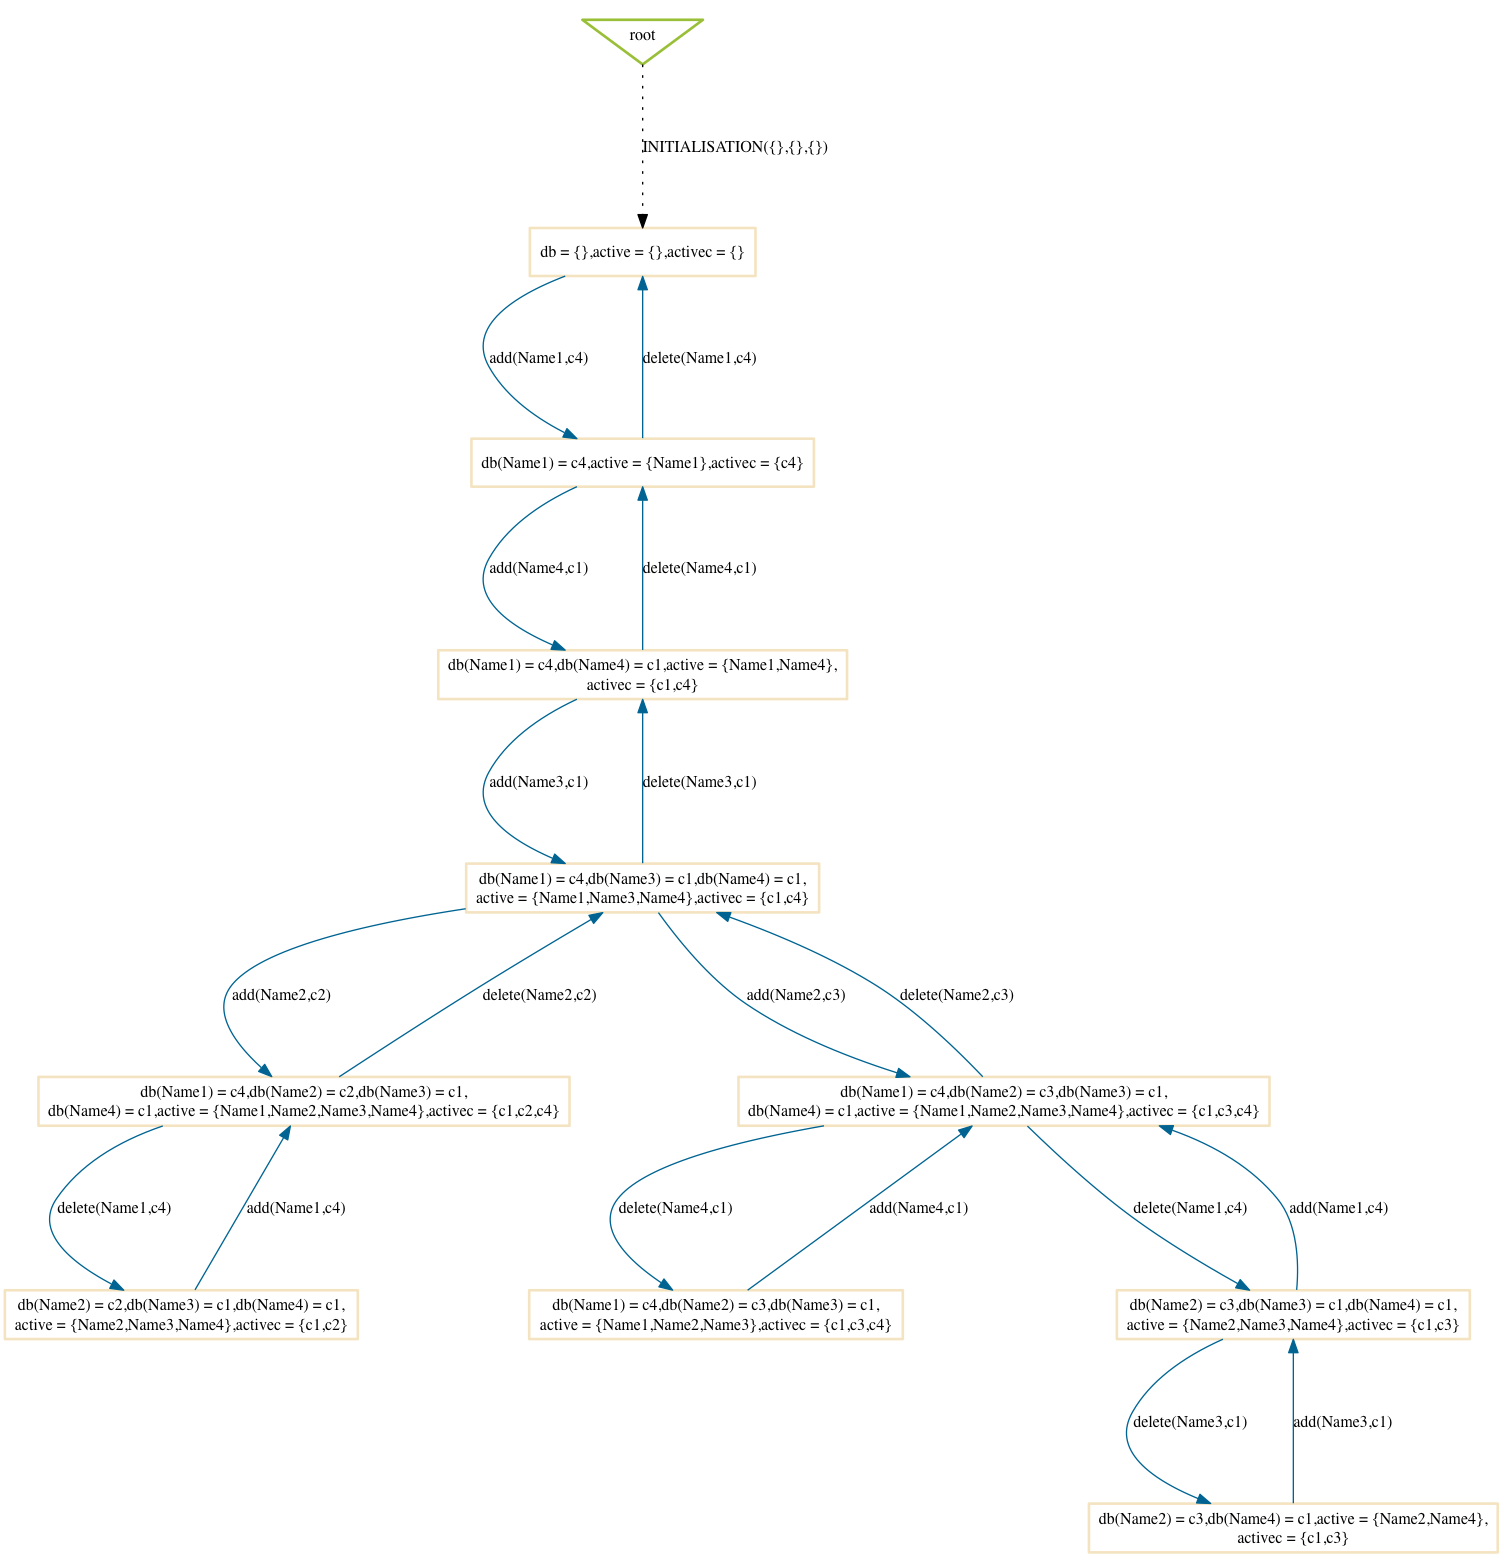
One can notice that ProB here has a tendency to go into depth, as the number of enabled operations decreases: if we add a name to the phonebook, four enabled operations disappear and only two appear (lookup and delete). Note: here it is important to set the MAX_OPERATIONS high enough, otherwise the resulting state space could be different.
More examples
A further illustration of directed model checking can be found in our "Blocks World" example.
Article
Michael Leuschel, Jens Bendisposto: Directed Model Checking for B: An Evaluation and New Techniques. SBMF 2010: 1-16